Installazione
Dipendenze
- Podman oppure Docker
- Python 3 (+ venv, yaml)
- PostgreSQL
- Java 21
- Maven
Esempio con Debian:
sudo apt install podman postgresql openjdk-21-jdk maven python3-venv python3-yamlClone del repo
git clone https://codeberg.org/LUG-Trieste/linux-bomb.gitSetup del database
sudo su - postgres
createdb bomb
psql bomb
Esegui il codice SQL contenuto in server/src/main/resources/db/migration/V1.0__db-structure.sql per creare le tabelle.
Questo si può fare ad esempio da psql nel modo seguente:
\i server/src/main/resources/db/migration/V1.0__db-structure.sqlCrea l’utente che il server usa per accedere al database:
CREATE ROLE bomb WITH PASSWORD 'bomb';
ALTER ROLE bomb WITH LOGIN;
GRANT ALL PRIVILEGES ON DATABASE bomb TO bomb;
GRANT ALL PRIVILEGES ON ALL TABLES IN SCHEMA public TO bomb;
GRANT USAGE, SELECT ON ALL SEQUENCES IN SCHEMA public to bomb;
Installare dipendenze Python della CLI
Installare le dipendenze in virtualenv:
cd cli
python3 -m venv venv
source ./venv/bin/activate
pip install -r requirements.txt
Compilare il server in Java
cd server
mvn clean package
Generare le immagini Docker
Ogni lingua ha le proprie immagini Docker. Se non ti interessa poter giocare in tutte le lingue o a tutti i livelli puoi limitarti a generare solo le immagini che ti interessano.
Generare le immagini base:
cd server/src/main/resources/static/levels/base

podman build -t linux-bomb-base:en .
podman build --build-arg LANG=it_IT.UTF-8 -t linux-bomb-base:it .
podman build --build-arg LANG=sl_SI.UTF-8 -t linux-bomb-base:sl .
Generare le immagini dei livelli:
cd ../1/
podman build -t linux-bomb-n00b:en .
podman build -t linux-bomb-n00b:it -f Dockerfile.it .
podman build -t linux-bomb-n00b:sl -f Dockerfile.sl .

cd ../2/
podman build -t linux-bomb-explorer:en .
podman build -t linux-bomb-explorer:it -f Dockerfile.it .
podman build -t linux-bomb-explorer:sl -f Dockerfile.sl .

cd ../3/
podman build -t linux-bomb-ninja:en .
podman build -t linux-bomb-ninja:it -f Dockerfile.it .
podman build -t linux-bomb-ninja:sl -f Dockerfile.sl .
Avviare lo script checker
cd checker
python3 checker.py
Avviare il server
cd server
java -jar target/bomb-0.0.1-SNAPSHOT.jar
Avviare la CLI
cd cli
source ./venv/bin/activate
python start-game.py
Visualizzare la UI
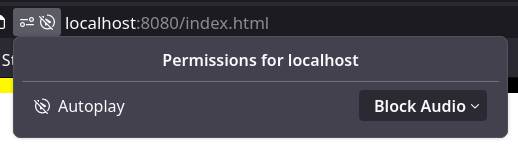
La UI è raggiungibile all’indirizzo http://localhost:8080.
Per far funzionare i suoni è necessario abilitare il permesso all’autoplay nella pagina.
Risoluzione di errori comuni
La UI non aggiorna step/errori
Verifica che lo script checker.py sia stato avviato correttamente e sia ancora attivo.
Se lo script checker funziona verifica eventuali errori nella console del browser.