Level 3
Attention, this is not a game; we are talking about a dirty bomb… you don’t mess around with neutrons. If you make a mistake, it will be noticed by the radiation detector that the ICTP brought to the fair. So, no joking around!
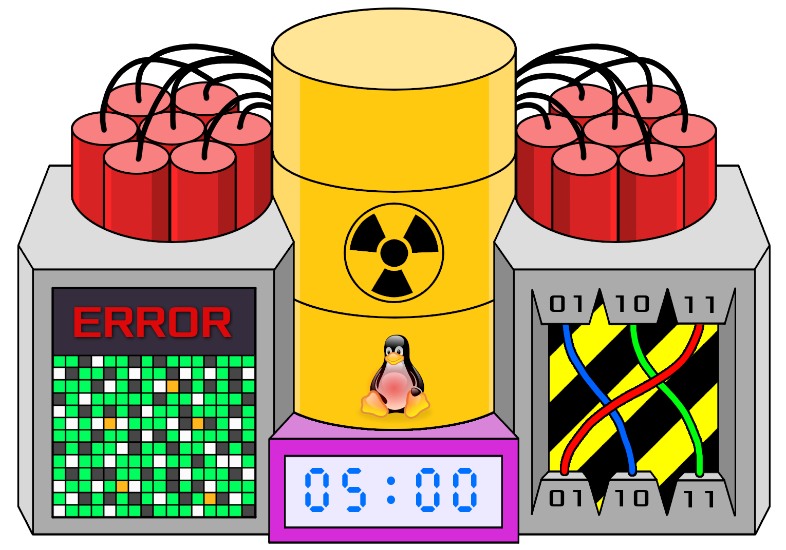
To the right of the bomb are the cables that connect the primary disarmament circuit. The builder has set a sequence of actions to activate it. He left instructions to follow with the warning that if they are not followed to the letter, the anti-tampering circuit will be activated, triggering detonation. In reality, the instructions do not seem easy to interpret. Look in the “cables” folder: there are other folders and subfolders and some files. How do the connections work?
- All connectors have a presence sensor.
- The cables must never be disconnected from the upper connectors.
- The first cable to be disconnected is the one connected to an odd high connector, but remember that you must disconnect it from the low connector.
- The second cable to be disconnected is also connected to an odd high connector.
- The priority for disconnection goes to the cable whose sum of connectors equals the XOR of the same.
- The third cable must be disconnected immediately after reconnecting the second one that was removed.
- The blue cable must not be reconnected to the connector it was previously connected to.
- The green cable is not the first to be reconnected.
- The first cable to be disconnected is the last to be reconnected.
- The green cable must be reconnected to the connector previously occupied by the red one.
Well, we managed to open the disarmament system console. The builder tells us that we need to type 2 characters that we find in the “password” file. The two characters are at the end of each line, after the colon “:”. At the beginning of each line, there is a string that starts with a number greater than 3 and ends with a number less than or equal to 5, which contains 2 non-contiguous uppercase letters separated only by an acronym of some aircraft that the builder does not remember… perhaps we could try with MiG-29, Il-76, Su-35, F-22, B-52, or EF-2000.
Once we find the two characters, we need to type them on the keyboard to the right of the bomb. But there are only 2 keys??? To press the keys, we need to queue the key symbol in the “keyboard” file. But be careful, the disarmament system has a microcontroller that is not particularly fast with a somewhat peculiar logic. There is a need to queue 4 symbols at a time in the file.
Well, the right disarmament circuit has done its job. Now it’s time for the left disarmament circuit. The screen shows incomprehensible pixels. There is a Perl script that corrects the problem, but it is broken as well. The builder indicated his intentions but was unable to find the problem. Solve it and save the correct result in the output.txt file in the same folder as the script. If the content of the output.txt file is correct, there should be some order in the pixels on the screen.
We are happy that the screen works, but in reality, the final disarmament interface is hidden behind it. We can then go and remove the screen by deleting the file we just generated. However, be careful: before deleting it, let’s save its size in bytes, as it is the password with which the code.txt.gpg file was encrypted using symmetric encryption.
If we have deleted the file correctly, a hexadecimal keypad will appear. We write the decrypted content of the code.txt.gpg file into the password file, and we will have deactivated the bomb!
